
I’ve never developed anything with python – but I had to install and run it on many build agents. Python was always painful, because of the many different version. In my current project there are many solutions with python script, and I must work on some of them. So – I’m going to learn Python, yeah!
But I don’t just want to learn python. I want to do it in an isolated and reusable environment. So instead of installing python, my idea was to use docker and Visual Code. And if we are here – let’s use docker on the Windows Subsystem for Linux (WSL) “2”. The setup looks like this:
- Windows 10 Home
- Windows Subsystem for Linux (WSL) 2 with Ubuntu
- Docker Edge
- Visual Studio Code
- Remote Container Extension
Note: You don’t need to use WSL 2 for this. This works perfectly with Docker without WSL! But I work a lot with WSL anyway and wanted to have docker work with the new WSL2. If you want to run in normally on Docker you can go to Install Visual Studio Code and the Remote Container Extension.
Install WSL 2 with Ubuntu
For WSL 2 you need the Insider Preview Build 18975 or later. That means you have to switch to the insider “Slow” ring, if you are not already. This can take some time, until the updates are installed.
Once you are on the insider build, you can activate WSL and install Ubuntu from the store. To enable WSL execute the following commands:
dism.exe /online /enable-feature /featurename:Microsoft-Windows-Subsystem-Linux /all /norestart
dism.exe /online /enable-feature /featurename:VirtualMachinePlatform /all /norestart
Restart your machine.
Now go to the Microsoft Store and install Ubuntu app. Open the app and provide a root password for your user.
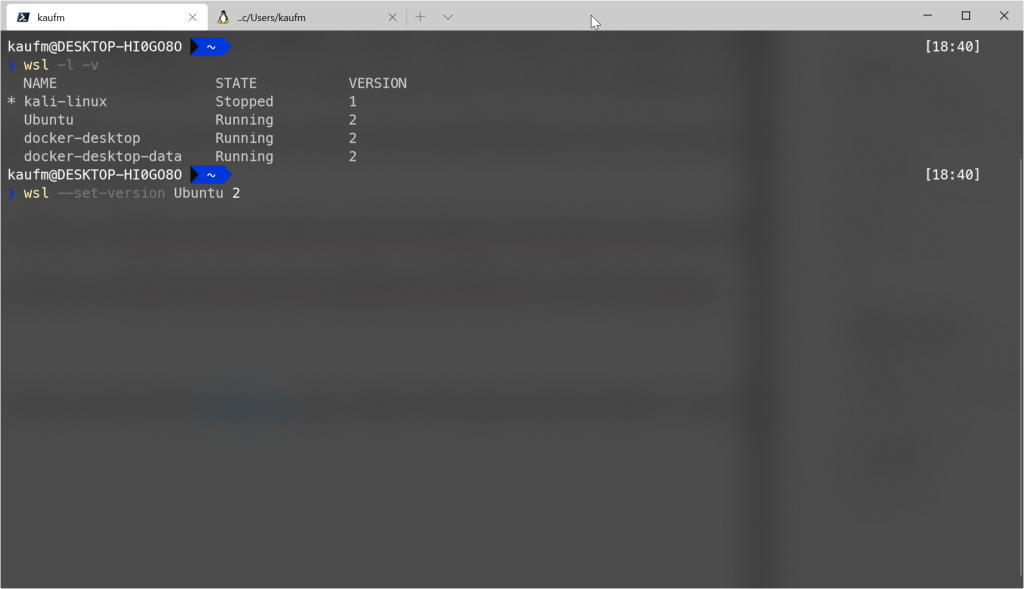
Now open a shell wsl -l -v. You see now a list of all your distros (at least Ubuntu). Now enter wsl –set-version <name> 2. The name must be exactly the name from the output of the previous command. If you want to make wsl 2 your default, you can do this with wsl –set-default-version 2.
Install Docker
Now download the Edge Version of Docker for Windows from docker.com. The setup will detect that you are running wsl 2 and ask you, if you want to use it. Say yes.
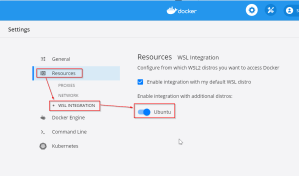
After the installation, go to docker settings (right click docker icon in tray à settings). Under Resources / WSL Integration you find you WSL 2 distro. Select the distro you want to run docker on.
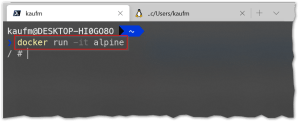
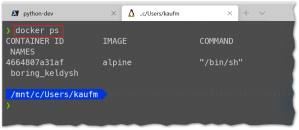
Now open a terminal and type docker run -it alpine. This starts a docker container. If you now open an Ubuntu shell you can type docker ps and you can see the running alpine instance.
Install Visual Studio Code and the Remote Container Extension
Download and install Visual Studio Code . I recommend the following extensions (F1 à Install Extensions):
Set-Up your repo to support containerized development
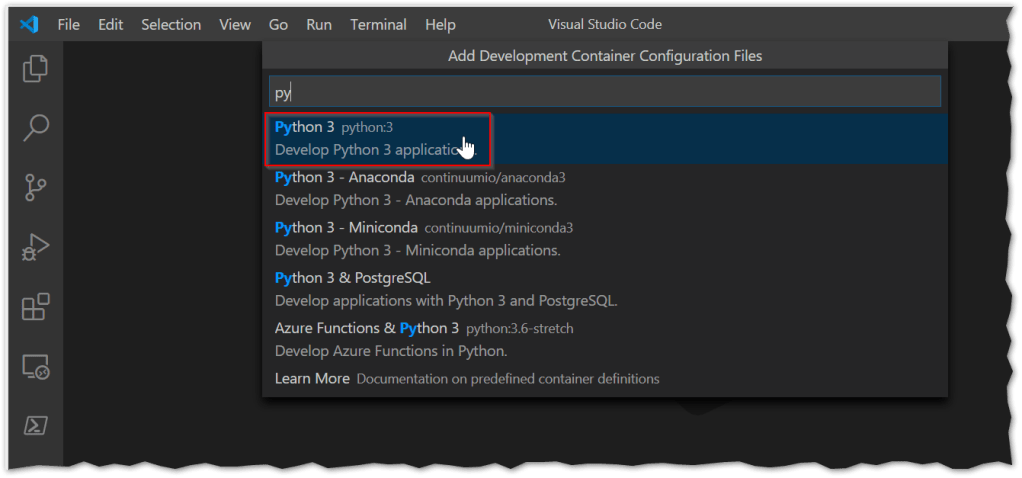
Clone your repo (in my case a repo containing some python files). Click the small green icon in the left bottom corner and select “Remote-Containers: Open Folder in Container…”. Select your repository. Now you can select a template for your docker container.

In my case it’s Python 3. There are a lot of templates. Also C# or F# with .NET, Java, Go and many more.
The extension creates a folder .devcontainer that contains a dockerfile and a devcontainer.json file. The dockerfiles defines the container. The devcontainer.json does all the magic. Use this file to install for example your dependencies in a post create command.

You are now connected to the container. You can see this in the left corner. Note that I don’t have python installed on my machine – but I can run python in the terminal in the container.
Environment Variables
Normally you need some environment variables inside your container (access tokens, URLs, config etc.). You can specify them in the devontainer.json. You can add a section “containerEnv” that sets variables that should apply to the entire container. Or you use “remoteEnv” for variables that are only available for Visual Studio Code and related processes. Note that the file has syntax highlighting. It’s easy to add new configuration sections.

The other option is to use a .env file (i.e .devcontainer/devcontainer.env). Add the variables line by line with KEY=value syntax. Specify the .env file as a runarg in the devcontainer.json:
"runArgs": ["--env-file",".devcontainer/devcontainer.env"]
Conclusion
Now I have a complete python development environment with all dependencies running in docker container on my Ubuntu distro in WSL2. I can run tests and debug the application. This is really awesome. It’s a little bit more time to set it up – but onboarding new team members is so much easier – with only one new member you have to time back that you spent for automation.
I can’t wait to try this out with a real programming language like .NET Core 😉
